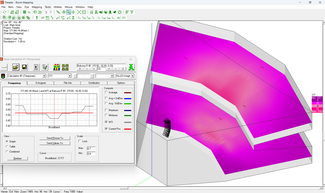
Show me how to use Standard Mapping (with Reflections)

Understanding Standard Mapping and Standard Mapping with Reflections is essential for creating meaningful results and therefore to be able to realize your projects successfully. This guide provides an introduction to Standard Mapping and Standard Mapping with Reflections in EASE 5. Both methods are located in the Room Mapping section, which can be found under the Calculations tab in the EASE 5 main window. Whether you are simulating the direct sound path from a loudspeaker to a listener or including reflections off walls and other surfaces, proper preparation is key for accurate results. The following guide will also point you to essential resources and tutorials to help you with the entire calculation process.
Please note, direct field sound pressure calculations in real time can be performed using Acousteer in the EASE 5 main window. Additionally, measures derived from the reverberation time, such as STI or clarity and definition, are calculated via the Room Mapping section under the Calculations tab.
Standard Mapping
Acoustic parameters in the Standard Mapping are calculated based on the approximate impulse response of the room which is derived from statistical (Eyring) reverberation time. This means the algorithm does not account for the materials location and how sound is reflected. This method is generally quick and works well for rooms with diffuse, statistically uniform sound fields. It provides a baseline understanding of how direct and reflected energy sum up at the location of the listening areas and how it affects acoustical values. This can be initiated through the Standard Mapping option in the menu, where the sound distribution across audience areas, seating, and other surfaces is computed.
Typical use cases for Standard Mapping are:
- Sound system design such as direct field coverage, delay alignment, spatial audio
- Acoustic design for simple rooms with controlled absorption
- Performance analysis such as STI, SPL, C50
- Reverberation time assessment and absorption improvements
- Initial room acoustics investigation for complexer room shapes
- Direct field sound auralization for evaluating system performance at listening positions
Typical venues include indoor spaces with relatively high, evenly distributed absorption and simple shapes, such as multi-purpose rooms, lecture halls, convention halls, churches, classrooms, and office spaces. Outdoor applications might involve concerts in rural locations, such as open fields.
Standard Mapping with Reflections
For projects where early reflections play a significant role, Standard Mapping with Reflections offers a more accurate model. While late reflection energy is still based on Eyring RT like in Standard Mapping, the early reflection energy is now calculated with the precise ray-tracing algorithm. Capturing sound reflections up to 3rd order, it provides the ability to analyse and rely on accurate early energy data. This method is particularly useful for acoustic simulations where early reflections play an important role for results an decisions, while the rest of the room response forms a relatively diffuse sound field.
Typical use cases for Standard Mapping with Reflection are:
- Analyzing and visualizing room reflections to study echoes, decay, and focusing effects
- Sound system design for challenging venues
- Evaluating STI, SPL, and C50 with reflection-inclusive mappings
- Optimizing ceiling, wall reflections, and acoustic panel angles
- Auralizing echoes and early reflections for better understanding
Typical venues include indoor spaces with uneven absorption distribution and complex geometry, such as studios, classrooms, lecture halls, multi-purpose rooms, ballrooms, theaters, dry entertainment venues, convention halls, malls, and conference rooms. Outdoor applications often involve concerts in urban areas, particularly with consideration of building facades.
Room setup for calculations

Before running any simulation, make sure your room model is complete. Each room must include:
At least one loudspeaker to act as a sound source.
At least one receiver – minimum of one audience area or one listener seat—where sound measurements will be analyzed.
Faces with related materials as absorption coefficients are considered during calculations.
Accurate results depend on having all essential elements in place, so a complete setup is crucial.
Our study guide Show me how to handle materials, loudspeakers and receivers gives further information on the above topics.
Important considerations before you start
For successful simulations, you need to keep the following points in mind:
Ambient noise: If you’re working with intelligibility predictions like STI, ensure you input ambient noise data properly to get accurate results. Learn more about this step.
Audience Areas and Listener Seats: The presence and arrangement of audience areas and listener seats is crucial for interpreting your results. Read more about how to account for this in your setup .
Back side elements: Some room configurations may require back side elements to be added for improved accuracy. A video guide on when and how to do this can be found here.
Video tutorial for complete setup and results
Further insights

Additional calculation considerations
If you are performing standard-compliant STI calculations, there are specific rules and parameters to follow to ensure the results meet standards. You can explore more on this topic here.
Troubleshooting common questions
If your mapping results display as all black or the SPL and STI readings show 0, you may have a configuration issue. This is a common issue, and guidance on how to resolve it can be found here.
Would like to see Standard Mapping in action?
If you would like to learn more about what kind of projects can be realized with EASE 5 Standard Mapping, please have a look at one of our Real-World Applications Speech intelligibility optimization for the auditorium of Fondazione MAST, Italy.